Installing Novell

A Guide for Windows XP-Calanit Tree Users


Download Install Novell Client
Configure Novell Client

Download Novell Client

Step

  • Download and save the client from our site.


Install Novell Client

Step


  • Double Click on Novell current client xp2003.exe

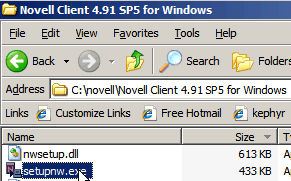
  • Extract to c:\novell.

  • Run: C:\novell\Novell Client 4.91 SP5 English\setupnw.


Step


  • Select Select this line to install in English.

  • Click OK.


Step


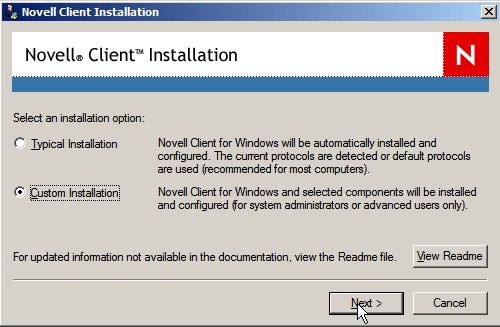
  •  Choose Custom Installation.

  • Click Next.

Step


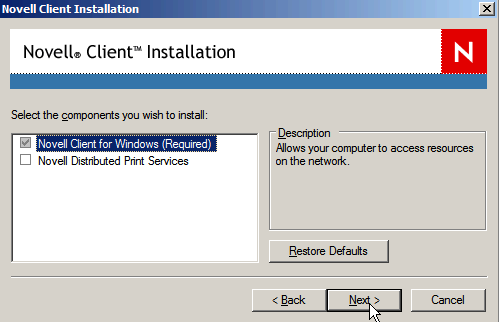
  • Leave Novell Client for Windows checked.

  • Click Next.

Step


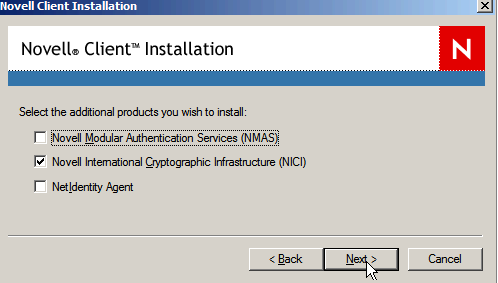
  • Uncheck NMAS.

  • Leave NICI checked.


  • Click Next.

Step


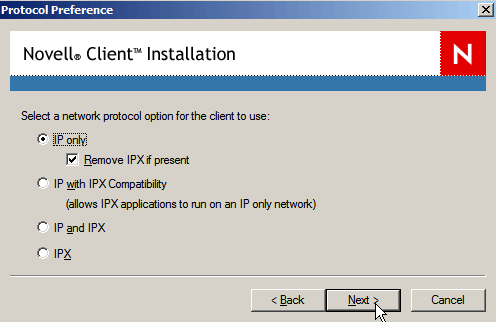
  • Check IP only. 

  • Check Remove IPX if present.

  • Click Next.


Step


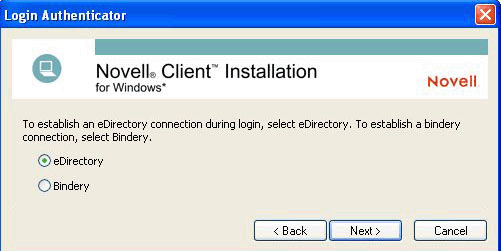
  • Leave eDirectory checked.

  • Click Next.


Step


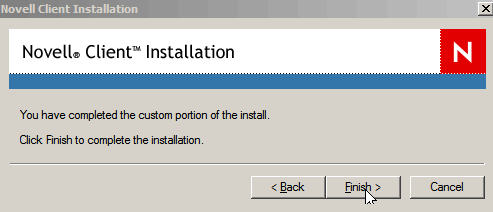
  • Click Finish.


Step


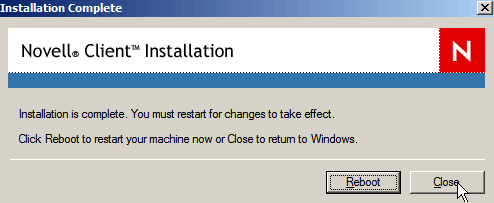
  •  Click Close.

  • DO NOT REBOOT!


Configure Novell Client


Step


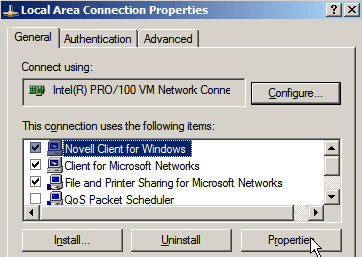
  • Go to Control Panel.

  • Click on Network Connections.

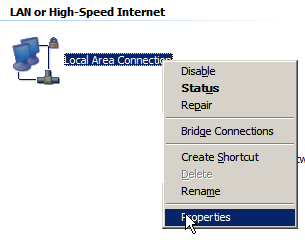
  • Right click on Local Area Connections.

  • Choose Properties.

Step


  • Select Novell Client for Windows.

  • Click Properties.

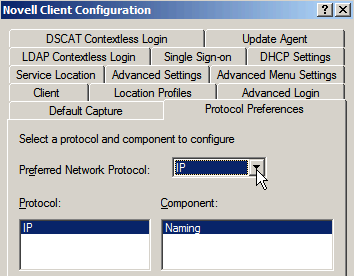
Step


  • Choose Protocol Preferences tab.

  • Set Preferred Network Protocol to IP.

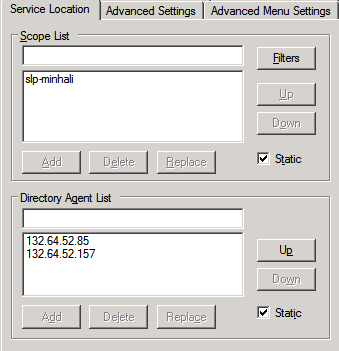
Step


  • Click on Service Location tab.

  • Under Scope List enter:"slp-minhali"

  • Click Add.

  • Under Directory Agent List" enter "132.64.52.85"

  • Click Add.

  • Enter "132.64.52.157"

  • Click Add.

  • Check both Static boxes.

  • Click OK.


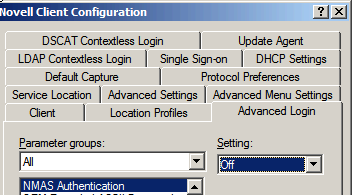
Step


  • Click on Advanced Login tab.

  • Find NMAS Authentication.

  • Under Settings choose Off.

  • Restart your computer


For further assistance, contact PC support at 6584848 or 6584280


Last updated: 03/11/2010